An edible chocolate dessert bowl is the perfect serving dish for a delectable Maple Butterscotch Bourbon Pudding topped with a fluffy cloud of freshly whipped cream. Making a chocolate bowl takes a little time and patience but the “wow” factor is definitely worth the work!
To make the process a little easier make the pudding one day and the bowls the next, then assemble just before serving. The pudding is a delightfully rich and decadent treat with sweet and salty butterscotch, a hint of maple and Maker’s Mark Bourbon Whiskey for a warm and slightly smokey flavor.
Sound good? Here is how you can make your own:
Maple Butterscotch Bourbon Pudding
The basic recipe can be found here – I added some maple extract and extra bourbon to my pudding.
Start by melting the butter in a medium sized saucepan, add the dark brown sugar and salt. Stir until sugar is completely moistened. Remove from heat.
In a small bowl whisk together the cornstarch and 1/4 cup of milk until smooth, then whisk in the eggs. Pour the remaining milk into the brown sugar mixture, whisking well to incorporate. Whisk in the cornstarch/egg mixture.
Return pan to heat and bring to a boil, whisking frequently. Once the mixture boils reduce the heat to low and simmer for one minute, whisking constantly until the pudding thickens.
Remove from heat and stir in the whiskey (i used 1 Tablespoon), vanilla, and I added 1 teaspoon of maple extract.
Pour the mixture through a fine sieve, pressing with a rubber spatula, to make sure that no cooked egg bits are in the pudding. At this point you can also run the mixture through a blender or food processor to create a super-smooth texture.
Pour finished pudding into a bowl (or individual serving dishes if you won’t be making chocolate bowls), cover and let chill for 4 hours or over night.
Chocolate Dessert Bowls
Here is a terrific video from The Chocolate Addict that shows how to make Chocolate Bowls. I highly suggest watching this video before attempting to make the chocolate bowls!
Ms. Katreece Montgomery (aka The Chocolate Addict) is a terrific creative chocolatier that I had the pleasure of meeting in person at a demo in the local Bloomingdales store here in San Francisco. After watching her make some amazing and whimsical chocolate goodies I decided to try my hand at these Chocolate Bowls.
You will need:
⢠small balloons
⢠dark or milk chocolate candy melts (if you use real chocolate you will have to temper it first)
⢠white chocolate candy melts
Start by lining a baking sheet that will fit into your fridge with some parchment paper or a Silpat. Set aside.
Wash and dry some small balloons and blow up to around the size of an orange. Blow up more balloons that you think you will need! I blew up 6 balloons but only ended up with 4 usable bowls. Set the balloons aside.
Melt up some milk or dark chocolate candy melts over a double boiler until smooth. Do not over-heat or the candy will become thick and unusable.
In a separate bowl melt some white chocolate candy melts in a microwave until smooth. Transfer the white chocolate to a piping bag. To keep the white chocolate fluid I kept my piping bag on a heating pad covered with a towel.
Grab a balloon by the tie and carefully dip into the melted dark chocolate, kind of rolling the balloon around to cover the sides and bottom. Lift balloon out of the chocolate and let it drip off a bit then place on the baking sheet.
Hold the balloon for a few minutes so it won’t fall over. Continue this process with the rest of your balloons until finished. At this point I put the balloons into the fridge to set for around 10 minutes.
After 10 minutes in the fridge, I took out one chocolate covered balloon at a time. Using scissors cut a small hole in the top to let the air out and begin to carefully peel the balloon away from the chocolate.
This is where you may have some trouble! Don’t worry if you get some holes in your chocolate bowl, as long they aren’t huge you can go back over them and patch with extra chocolate.
If any of the bowls collapse, save the pieces for patching and just go on to the next bowl. After you remove each balloon put the bowl back into the fridge and repeat with the next bowl until finished.
To patch any holes in your chocolate bowl: take a piece of one of the collapsed bowls, dip in a bit of melted chocolate and patch the hole from the inside. Return bowl to fridge to chill.
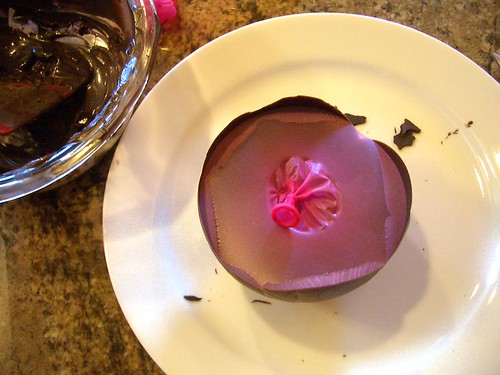
When all bowls are finished and chilled, take sheet of bowls
from fridge and set on counter. Pick up one bowl at a time and hold upside down. Taking the piping bag of white chocolate, drizzle up and down over the bowl, making sure to cover any of the patched spots. Return bowl to baking sheet. Repeat on all bowls and return to fridge to chill.
Assembly
When you are ready to serve, remove bowls and pudding from fridge. Scoop pudding into bowls, top with freshly whipped cream. I added a little chocolate decoration that I made with some Chocolate Transfer Sheets (more about them next week!)
Grab a spoon and enjoy!


